Foveon
A neural sensor translator. Takes a photo from any Bayer-array camera and renders it as if it were shot on a Sigma DP2 Merrill — the Foveon X3 stacked-sensor look, with the colour and microdetail Foveon is famous for, on hardware you already own.
Under the hood: a modified U-Net with an extra layer injected between the encoder bottleneck and the upsampling decoder. The injected channel carries a one-dimensional encoding of three-layer pixel-stack structure — the B·G·R photodiode column that a Foveon sensor captures and a Bayer sensor can’t. Trained end-to-end against matched Bayer → Merrill scene pairs.
with 3-layer pixel
injection at bottleneck
Foveon X3 stacked-
sensor look out
scene pairs against
Sigma DP2 Merrill
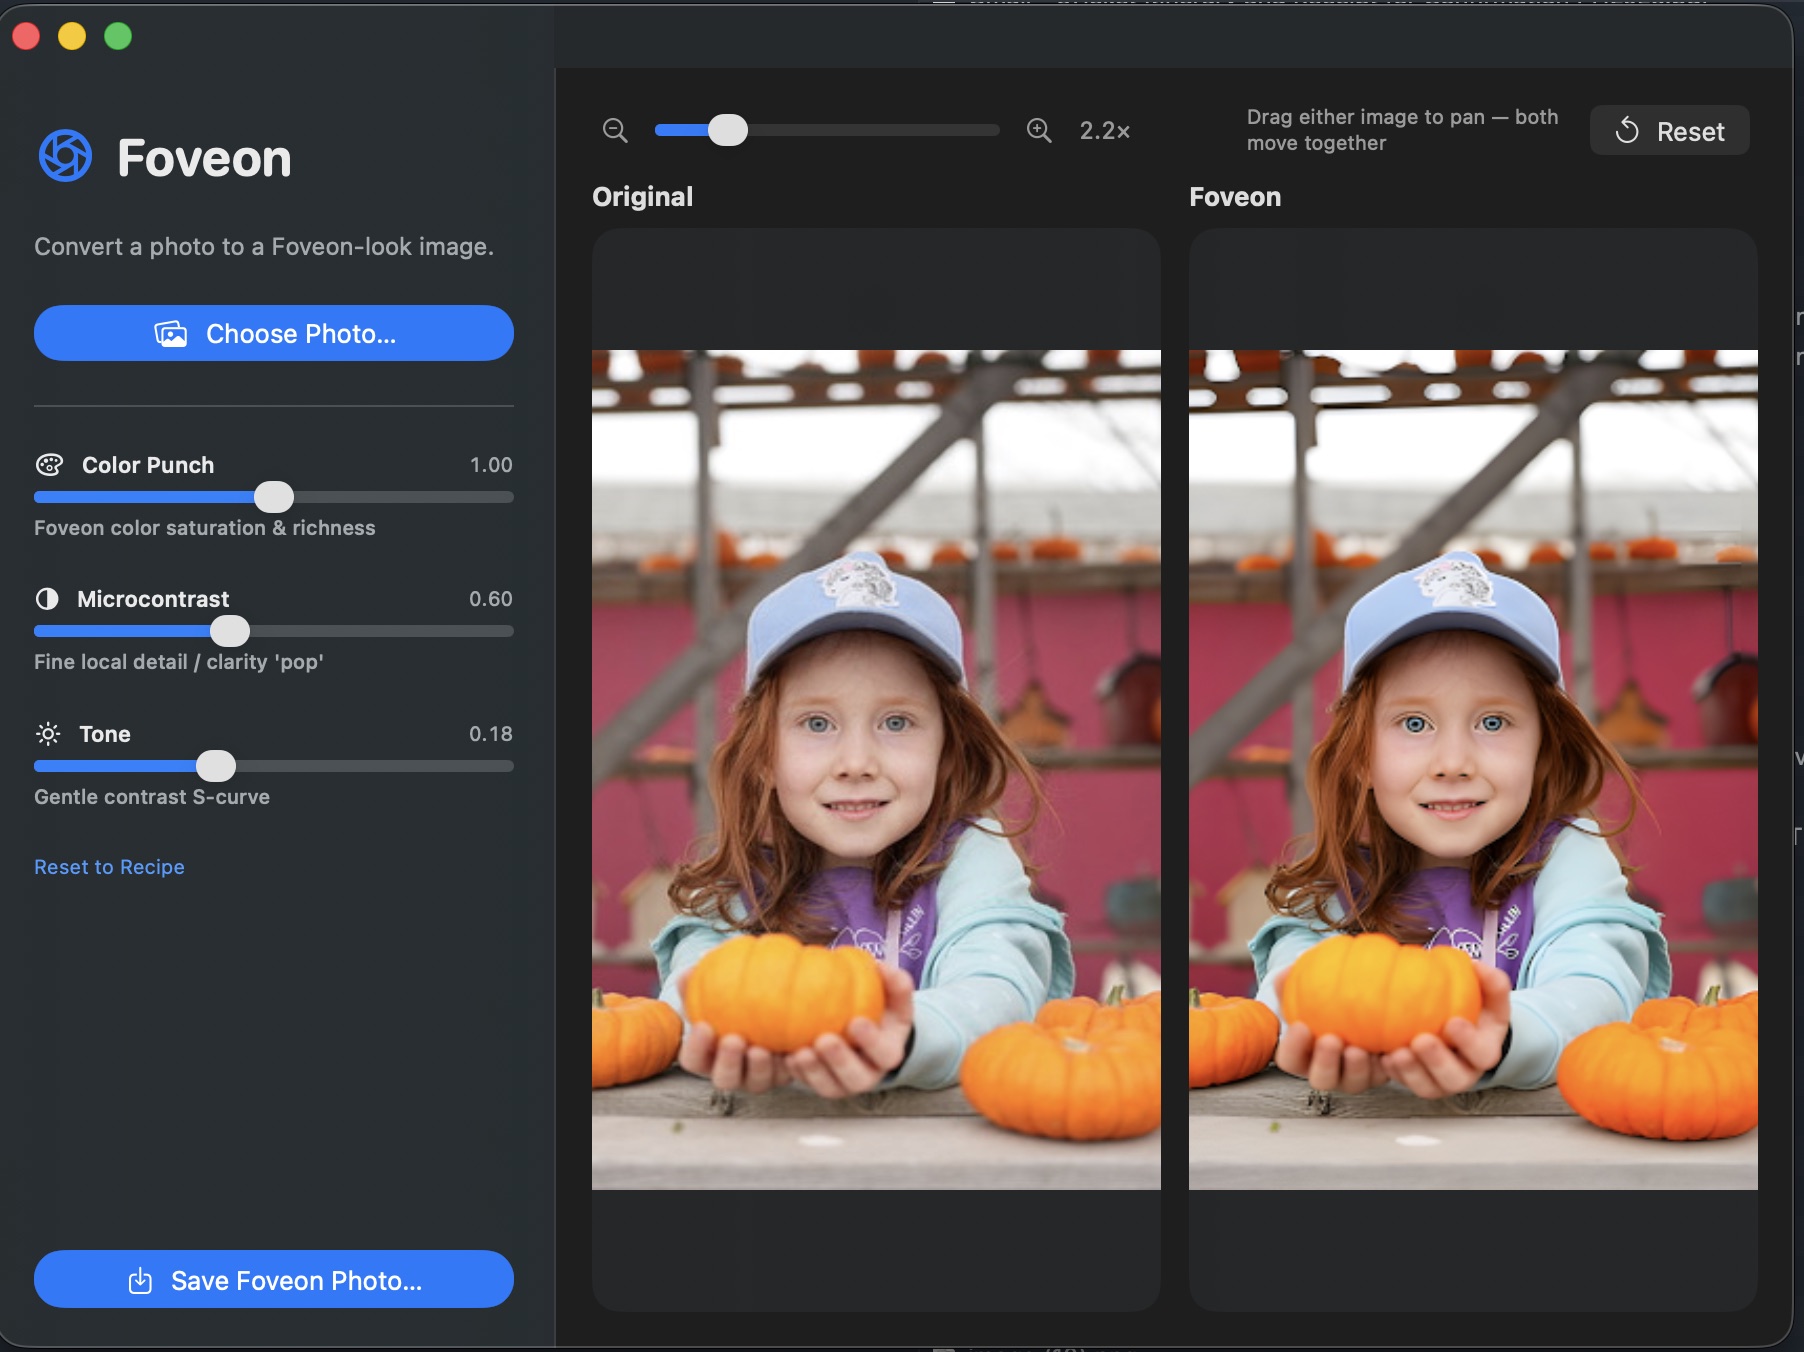
Foveon — macOS app. Choose a photo, drag the sliders, save the result.
What it is
Most digital cameras capture colour through a Bayer colour filter array: each photosite sees only one of R, G, or B, and the other two channels are interpolated from the neighbours (demosaiced). It’s efficient, but it costs you. The interpolation introduces colour fringing on sharp edges, smears fine detail, and produces the “digital” micro-contrast that even high-end Bayer cameras can’t fully shake.
The Foveon X3 sensor — Sigma’s now-rare design used in the DP1, DP2, and DP3 Merrill cameras — works the way colour film does. Three photodiode layers are stacked vertically at every single pixel position. The top layer absorbs blue, the middle layer green, the bottom layer red. Every pixel captures the full colour. No interpolation, no demosaicing artefacts, no false detail. The result is the “Foveon look”: extraordinary microdetail and a particular colour rendition — warm, dimensional, almost slide-film — that people build entire camera systems around.
Foveon (the app) is a neural network that learns the mapping between the two. Feed it a JPEG or RAW from a normal Bayer camera (phone, mirrorless, DSLR) and it predicts what the same scene would look like shot on a Foveon X3 sensor. Geometry stays the same; colour, tonality, and micro-detail rendering shift toward the Merrill side of the training distribution.
Bayer vs Foveon — the structural problem
The architecture
The core is a standard convolutional U-Net: an encoder that downsamples the input image into a compact feature bottleneck, paired with a decoder that upsamples back to full resolution, with skip connections at every level so fine spatial detail survives the trip through the bottleneck.
The modification is a single new layer dropped in between the encoder’s final downsampling block and the decoder’s first upsampling block: a 1D pixel-stack injection layer that concatenates a one-dimensional encoding of how colour absorbs through silicon depth on a real Foveon sensor — blue first, then green, then red. The decoder learns to use this prior to reconstruct the kind of inter-channel coupling that real X3 captures exhibit — chroma that’s registered with luminance instead of interpolated against it.
Encoder (blue) downsamples the Bayer input. The 1D injection layer (orange) concatenates the Foveon B·G·R depth prior at the bottleneck. Decoder (purple) upsamples back to full resolution. Skip connections (dashed) carry pre-bottleneck spatial detail across to the matching decoder level — standard U-Net, drawn here for completeness. The novel piece is the orange block.
Training
The model is trained end-to-end against matched scene pairs: the same subject captured simultaneously by a Bayer-sensor camera and a Sigma DP2 Merrill, the two images aligned and cropped to identical framing. The Bayer image is the network input; the Merrill image is the reconstruction target.
Capture matched pairs
A Bayer-sensor camera and a Sigma DP2 Merrill are tripod-mounted side-by-side. Each scene is photographed simultaneously by both. We bias capture toward the categories where Foveon rendering differs most visibly from Bayer: outdoor light, foliage, skin tones, fabric, water, metallic surfaces.
Align & crop
For each pair we run a homography-based alignment (feature-matched on luminance) so the two images share an identical pixel grid despite the different sensor sizes, focal lengths, and viewpoints. The aligned tiles are cropped to common framing and resampled to a shared resolution. Misaligned pairs are filtered out.
Develop the Merrill target
DP2 Merrill RAW (.X3F) files are developed in Sigma Photo Pro with neutral parameters — zero added sharpening, native colour profile, no creative tone curve. This is the “ground truth” the network is asked to predict: what the X3 sensor saw, minimally interpreted.
Tile & augment
Each aligned pair is sliced into overlapping 256×256 tiles for training (the U-Net handles arbitrary input sizes at inference, but training on fixed tiles keeps batches efficient). Augmentations: random crop, horizontal flip, small rotation, exposure jitter on both halves of the pair in lock-step.
Loss composition
Three components, summed with weights tuned to keep colour and detail in balance:
L1 pixel loss anchors absolute colour fidelity;
VGG perceptual loss carries microdetail and texture
(the network learns the Merrill look, not just the
average pixel value); a small TV smoothness penalty
keeps the output from inventing sharpening artefacts in flat
regions.
Train & validate
AdamW optimiser at lr = 2e-4, cosine
schedule, mixed-precision on a single 24 GB GPU. Batch size
16 tiles. We hold out roughly 5% of pairs as a validation set
stratified by category (skin, foliage, fabric, etc.) so the model
isn’t accidentally memorising a few scenes. Best checkpoint
is the one that minimises validation perceptual loss, not L1
— perceptual loss tracks the X3 look more reliably than
pixel error.
What it produces
A schematic comparison: what the same uniform skin patch looks like coming out of a Bayer demosaic pipeline (left) versus what the network predicts the Merrill would have rendered (right). The Bayer side has slight chroma drift between cells; the Merrill side is uniform.
between adjacent pixels —
the demosaic signature
microdetail preserved —
the Foveon X3 signature
The app
Foveon ships as a native macOS app with a clean three-pane workflow: pick a photo on the left, watch the preview update on the right. Three sliders shape the conversion:
0 the output sits closer to the original Bayer
colours; at 1.0 (default) the full Merrill warmth
and saturation come through.
0.18 matches Sigma Photo Pro’s neutral
tone; push it for a more cinematic look, drop it for a flatter
starting point you can grade externally.
Drag either preview panel to pan; both panels move together so the
same crop is always in view on both sides. Reset snaps
the view back to fit, Save Foveon Photo… writes
the result.
Install & use
Foveon runs natively on Apple Silicon. A 24-megapixel input converts in well under a second on an M2; the model uses MPS for inference and stays within ~3 GB of unified memory.